AMSA
AWS Academy Usage
This is a guide that shows you how to:
- Access the AWS academy and start the lab you’ll be working on.
- How to automatically create the resources that we give to you for PRAC-4.3 and PRAC-4.4 (VPC’s, subnets, etc.)
- [Optional]: How to stop the lab in case you don’t want to run your resources 24/7
- [Optional]: How to reset the lab, so you can “start fresh” if something is wrong or you want to re-try the assignment from a “clean” aws environment.
Login to AWS Academy and access the course
Please check your email and accept our course invitation before proceeding. If you still need to create your account, go ahead and complete that step first.
First of all, go to the aws academy login webpage, you will see the following page, click on Student Login: 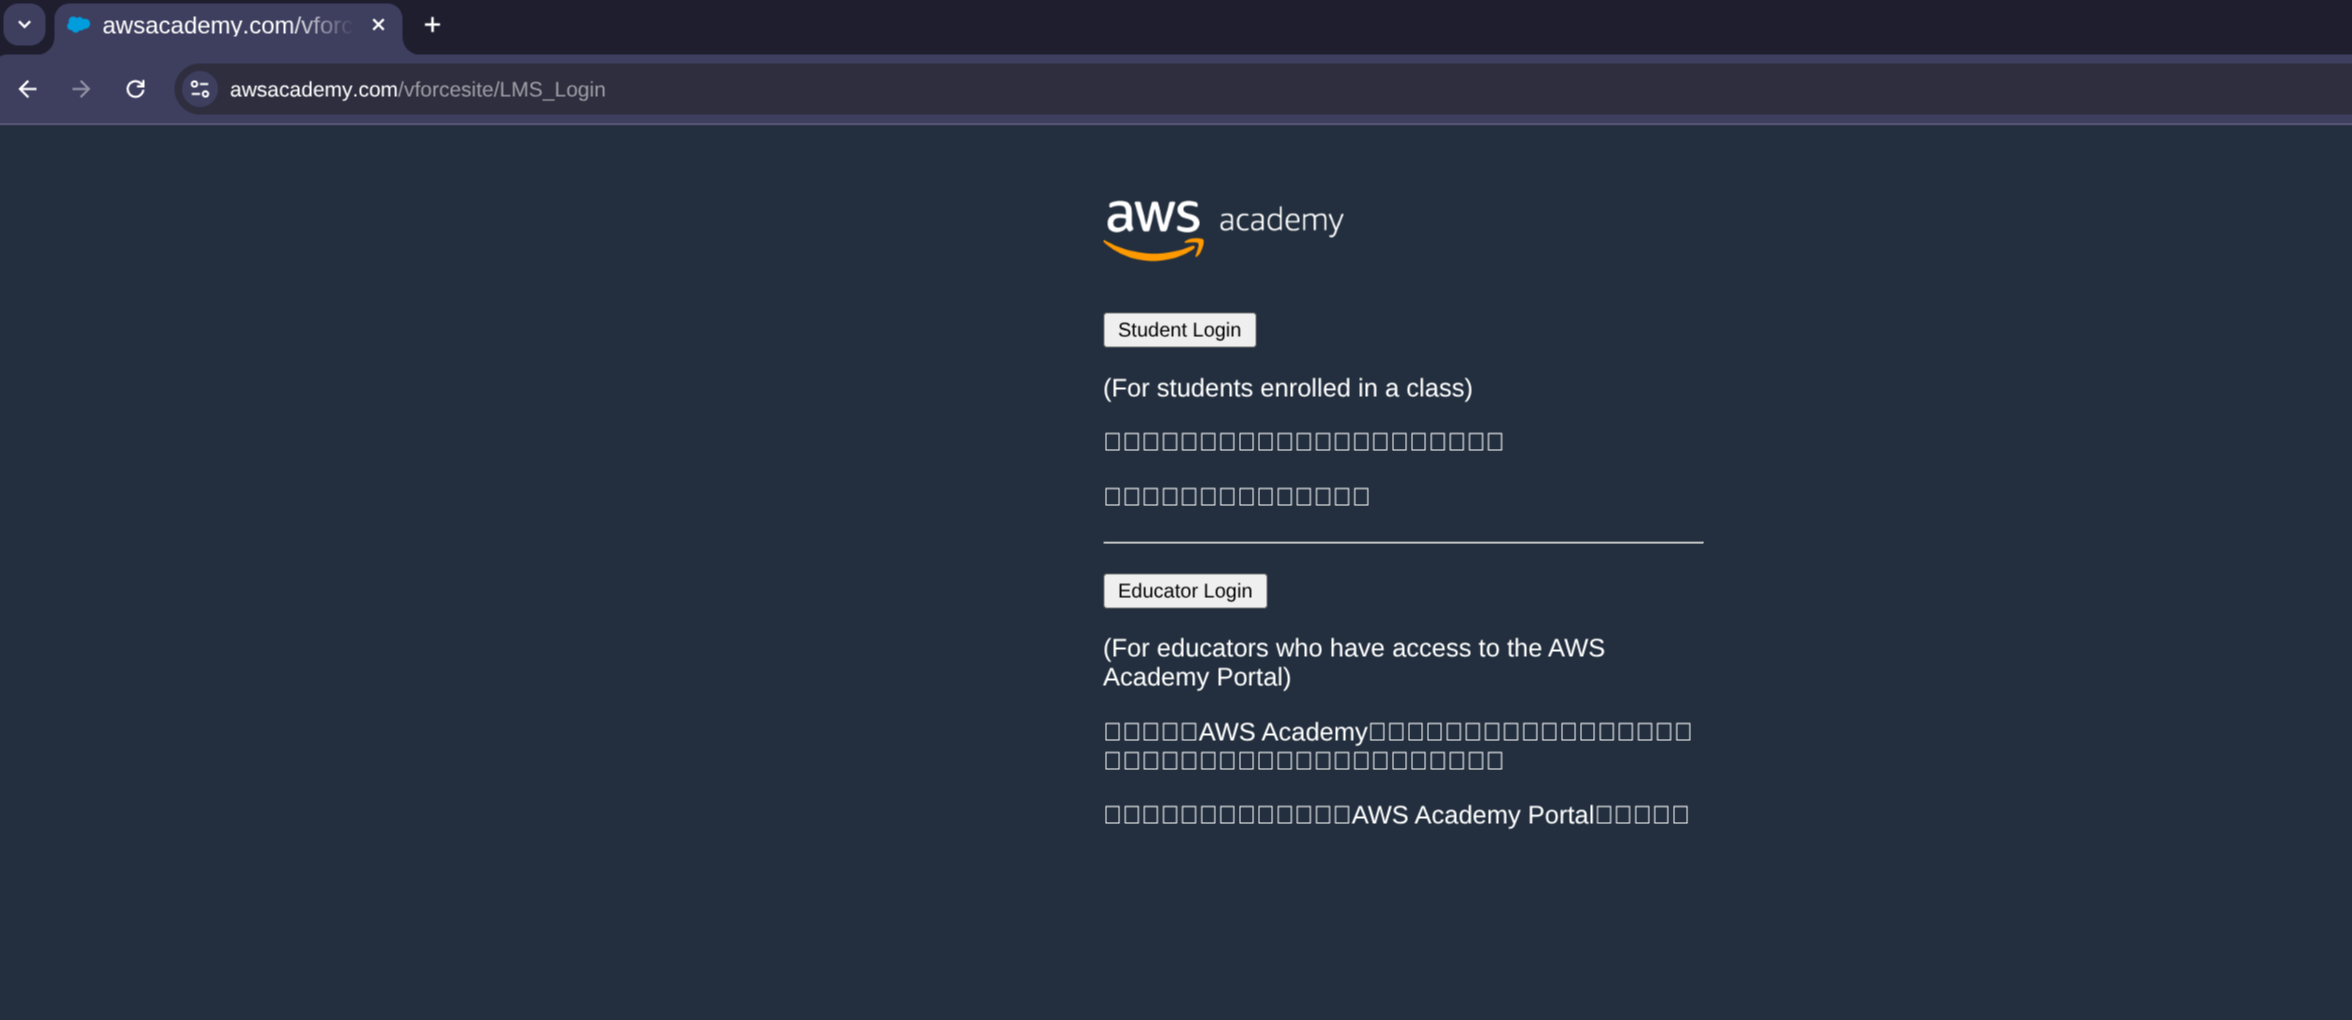
Log-in, be aware that it will send a 2FA code to your email. After that, AWS-Academy will show you the next page, click on LMS: 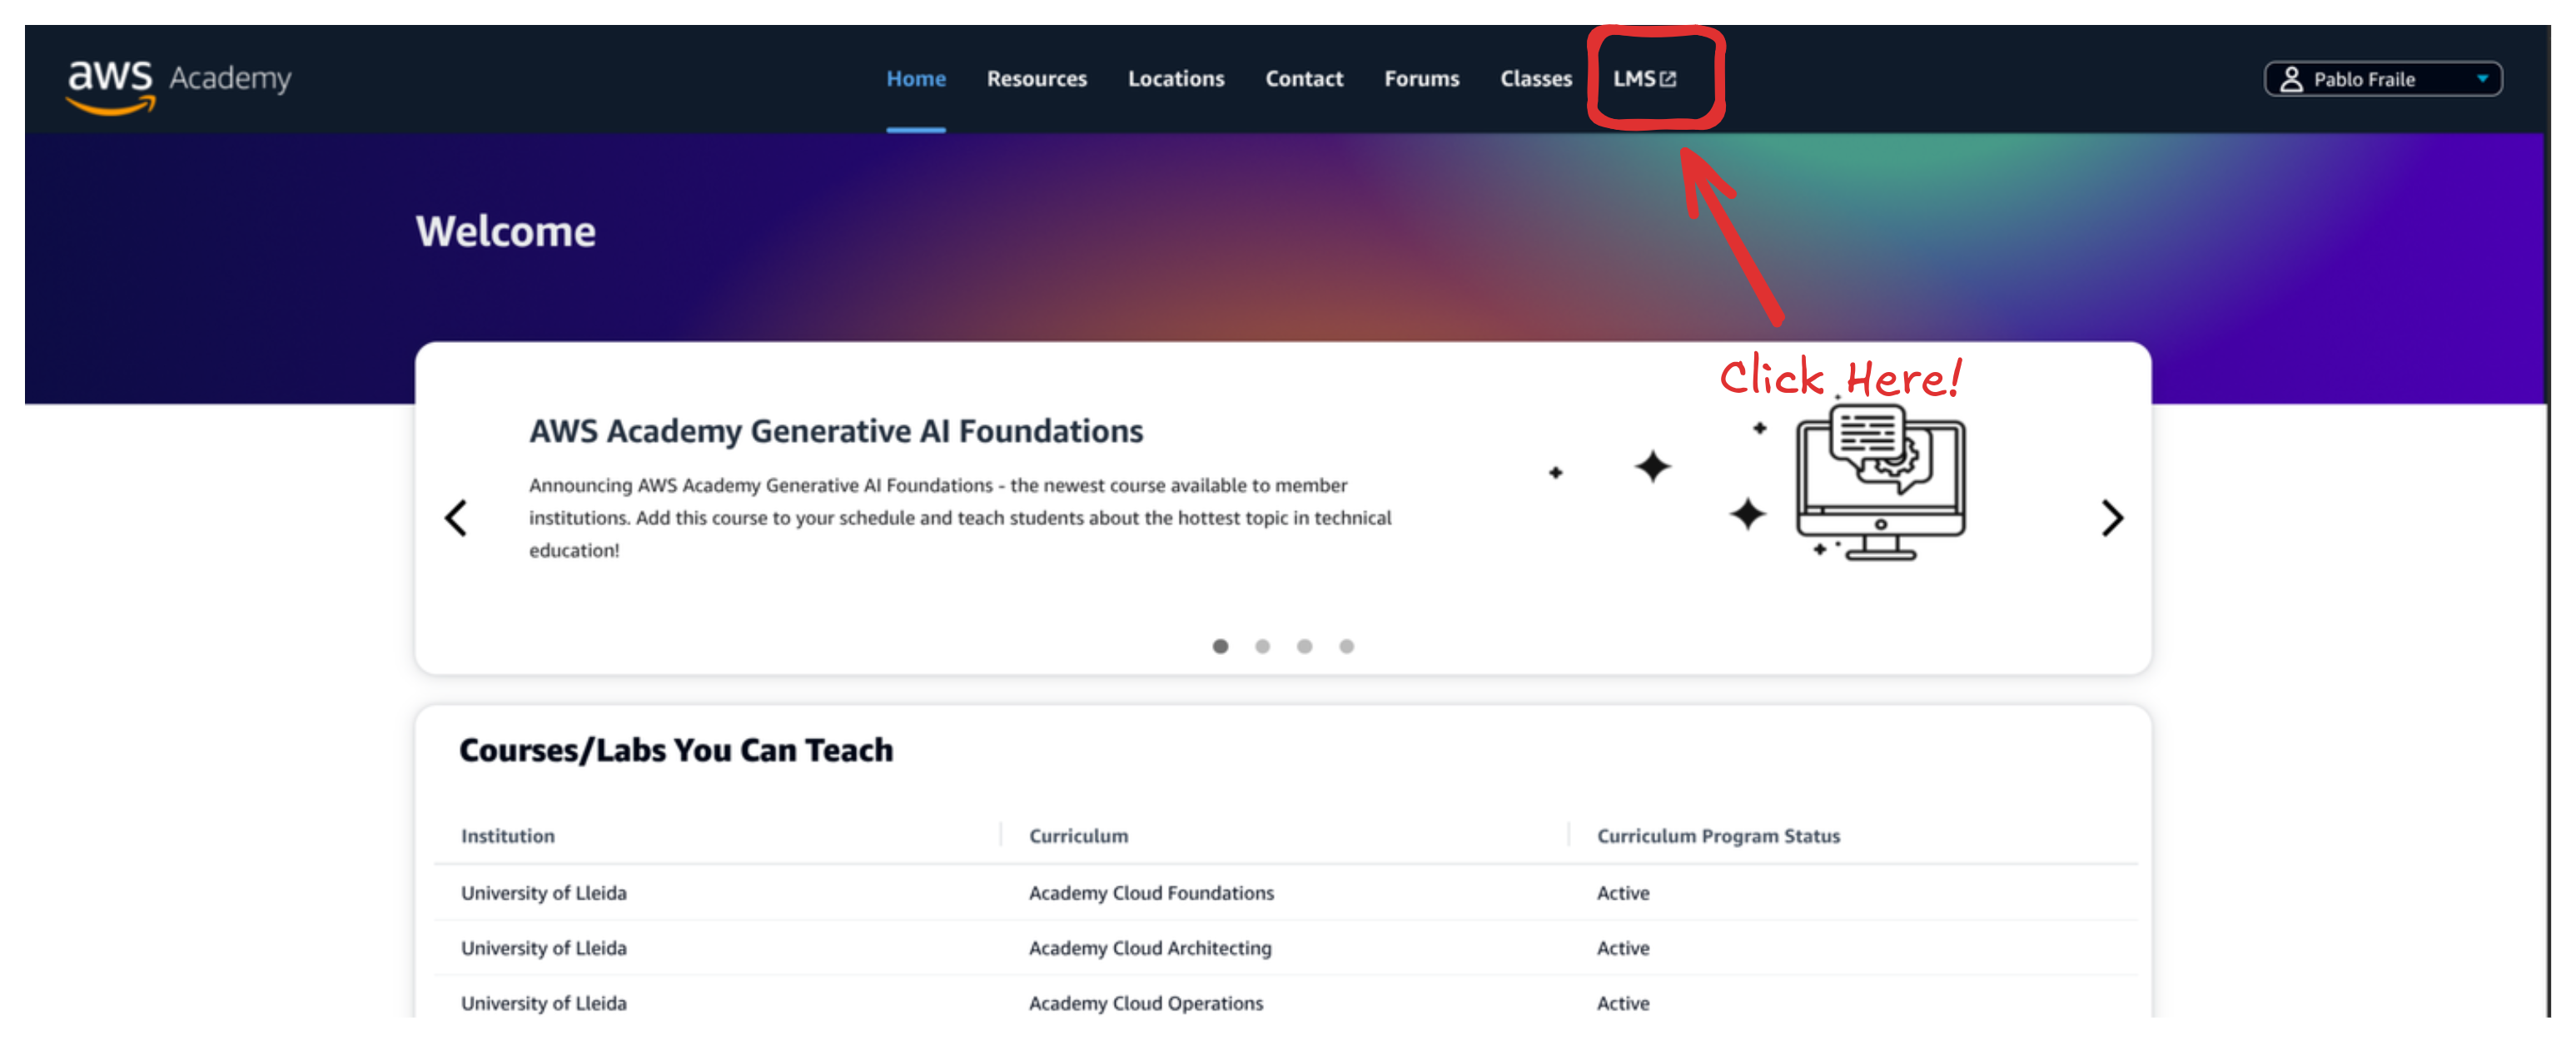
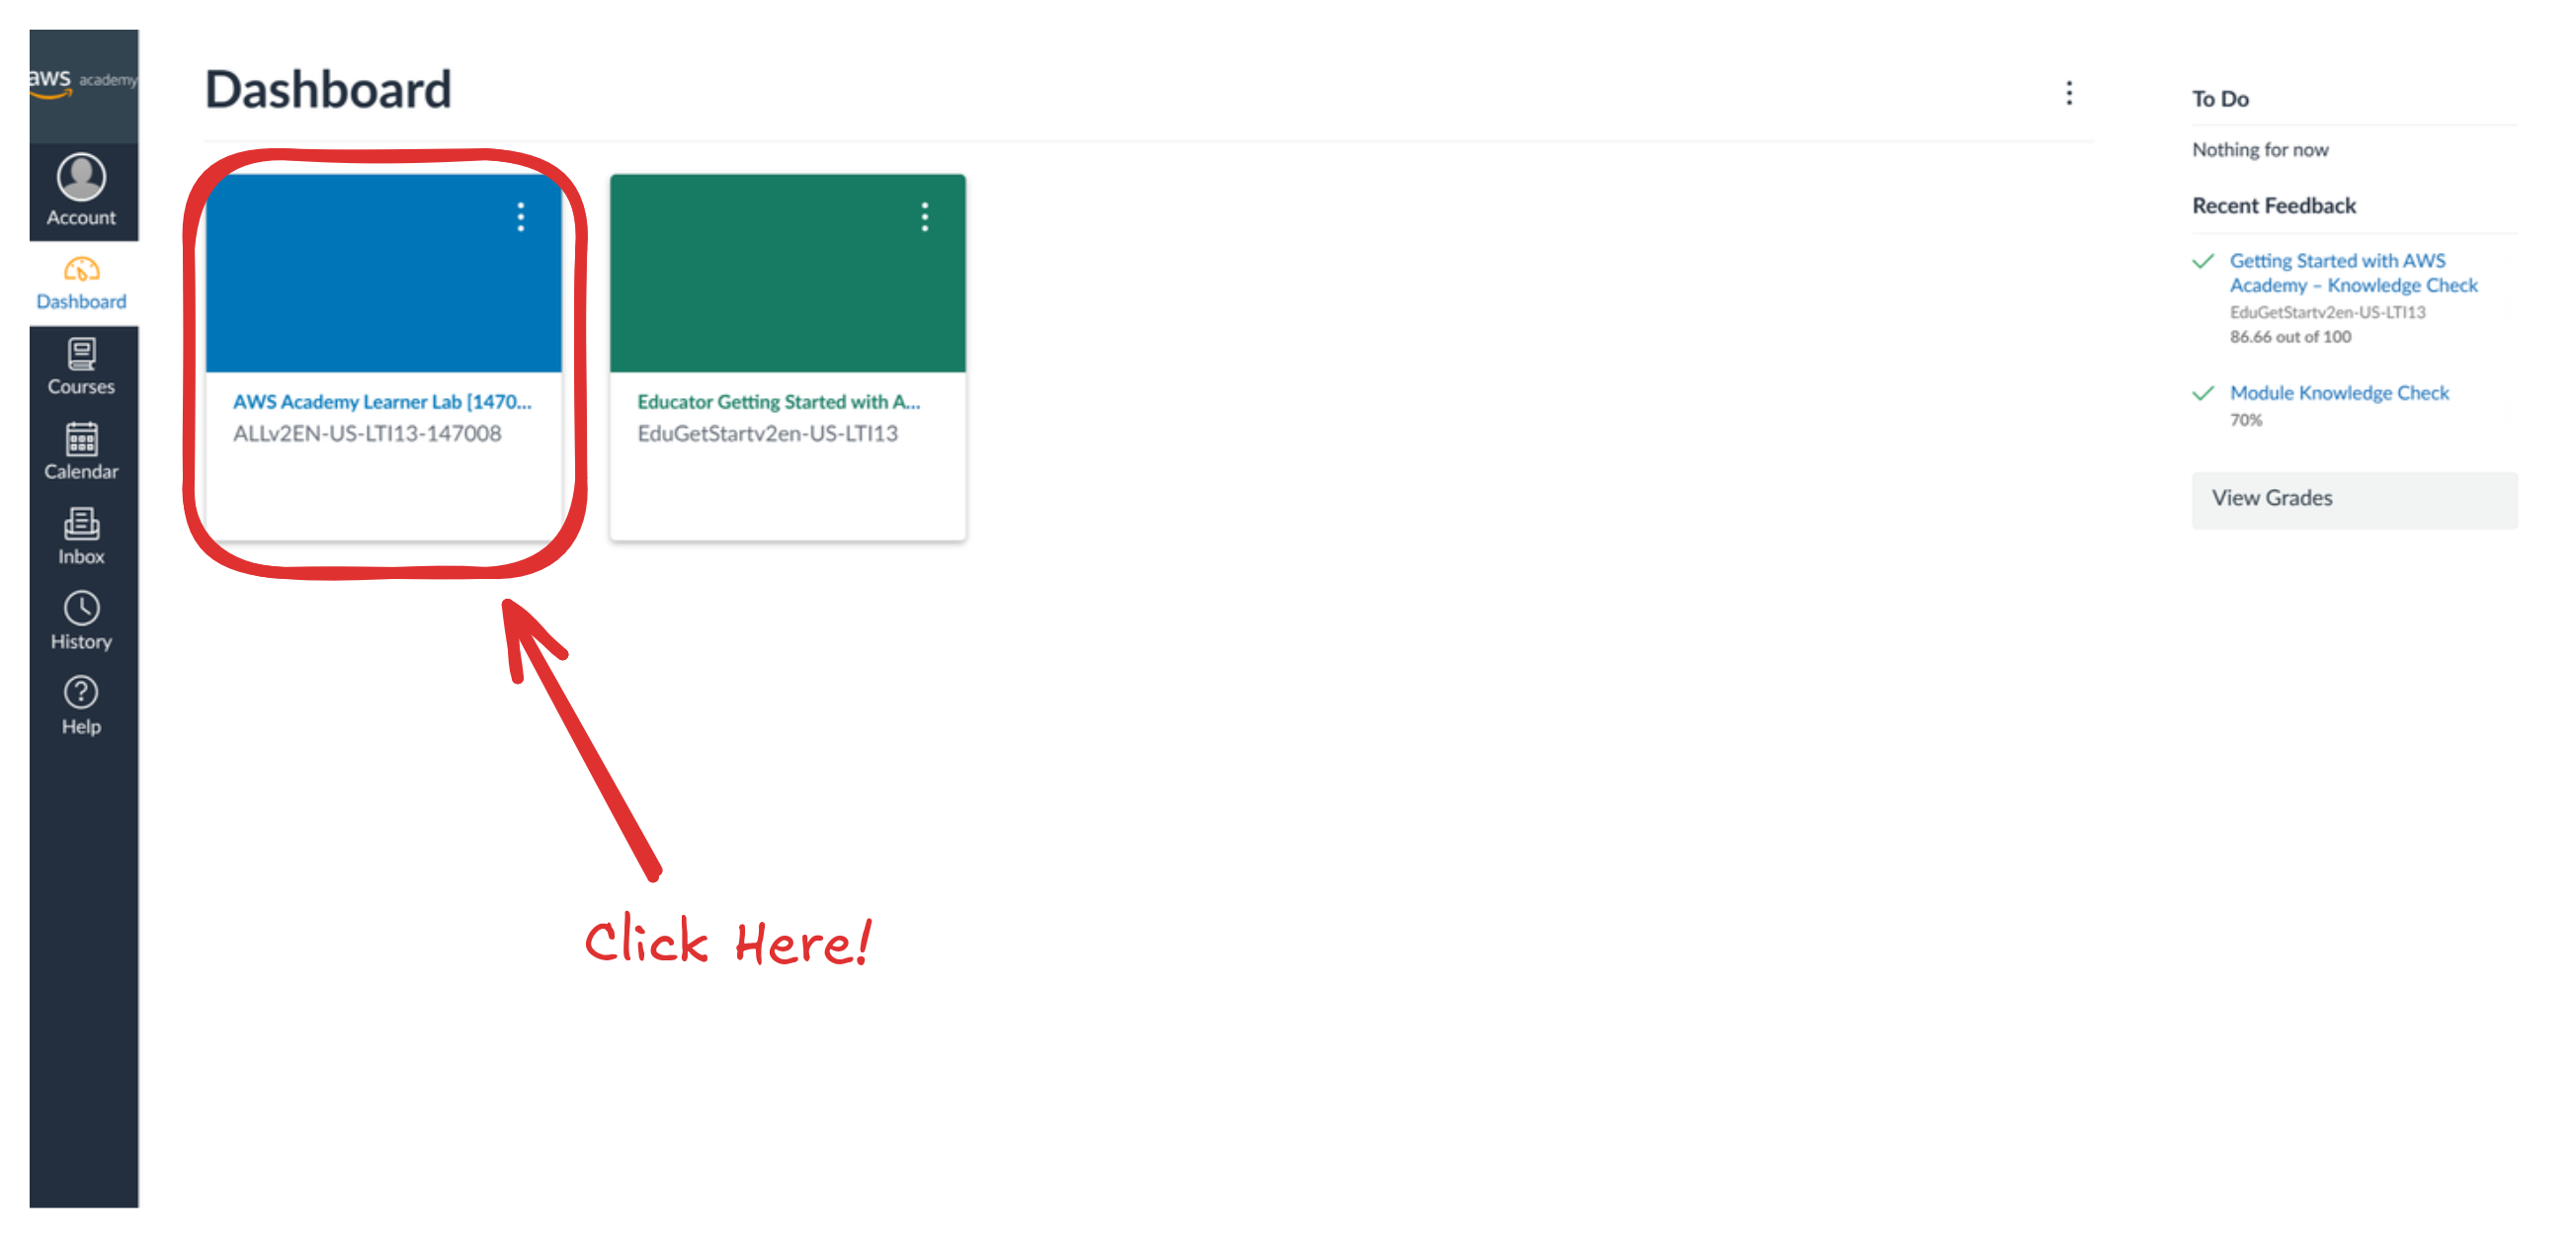
After that, it will show you the AWS-Academy Learning Management System page, you’ll se a dashboard with all your courses, click on the AWS Academy Learner Lab [147008] one!:
Hey! You’re now on the AMSA-25/26 course page. Here you’ll find the instructions you need to set up your lab.
To get started, open the link listed in Step 1 (Anar a AWS Academy Learner Lab).
We STRONGLY recommend opening it in a new tab: 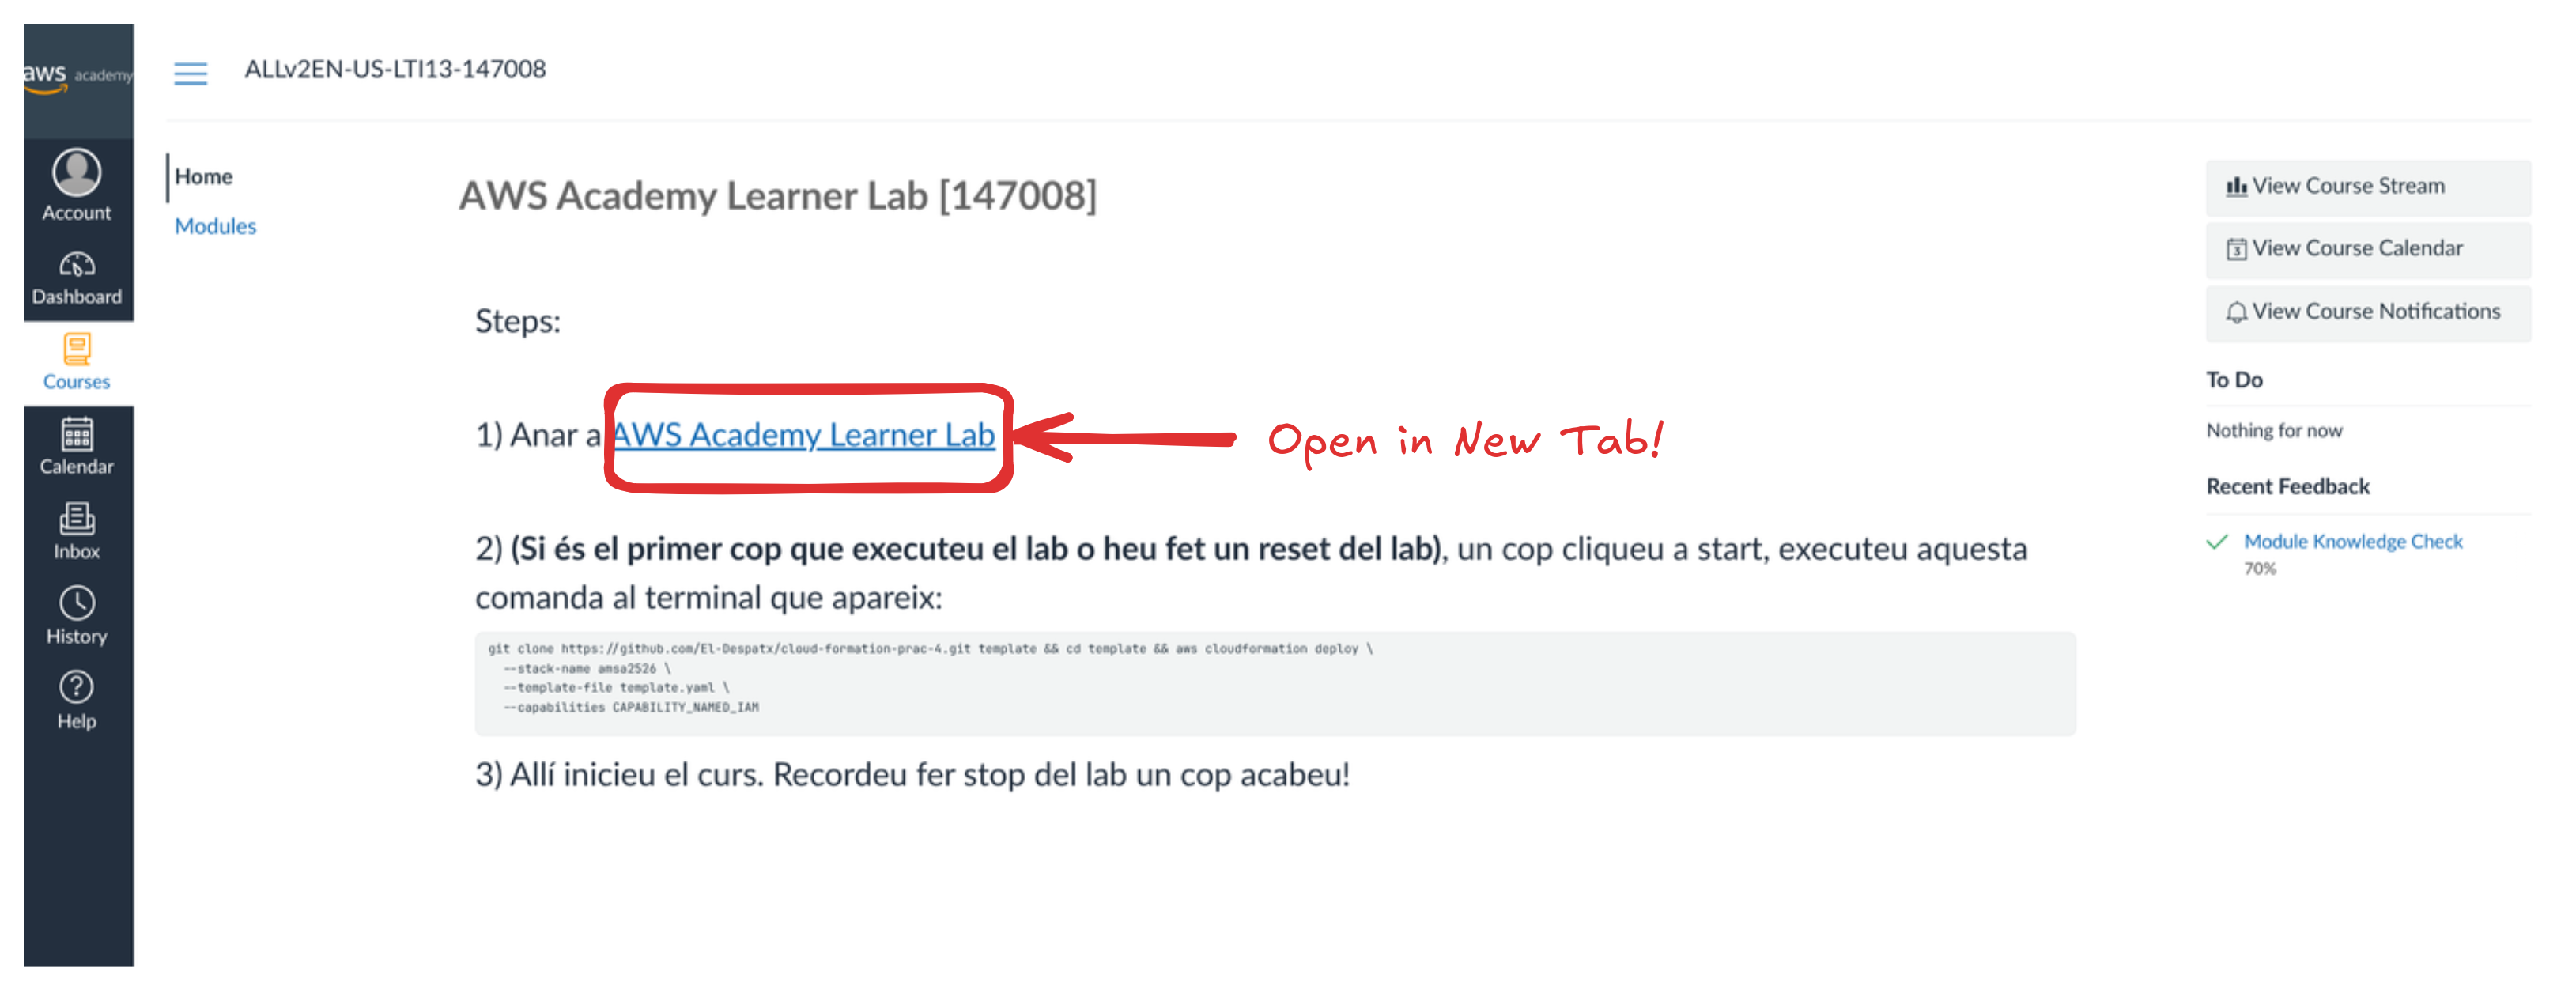
After that, click on Launch AWS Academy Learner Lab: 
And now, start an AWS environment, click on ▶️Start Lab !: 
[Optional: only on first time or lab Reset] Create the networks of our Lab
The first time you run the lab (or after resetting it), you’ll need to execute the command we provided. This will automatically create the resources required for PRAC-4.3 and PRAC-4.4, so you don’t have to create them manually.
Simply copy the command and paste it into the terminal:
git clone https://github.com/El-Despatx/cloud-formation-prac-4.git template && cd template && aws cloudformation deploy \
  --stack-name amsa2526 \
  --template-file template.yaml \
  --capabilities CAPABILITY_NAMED_IAM
Make sure the lab is running (the indicator in the top-left corner should show AWS 🟢, not AWS 🔴):
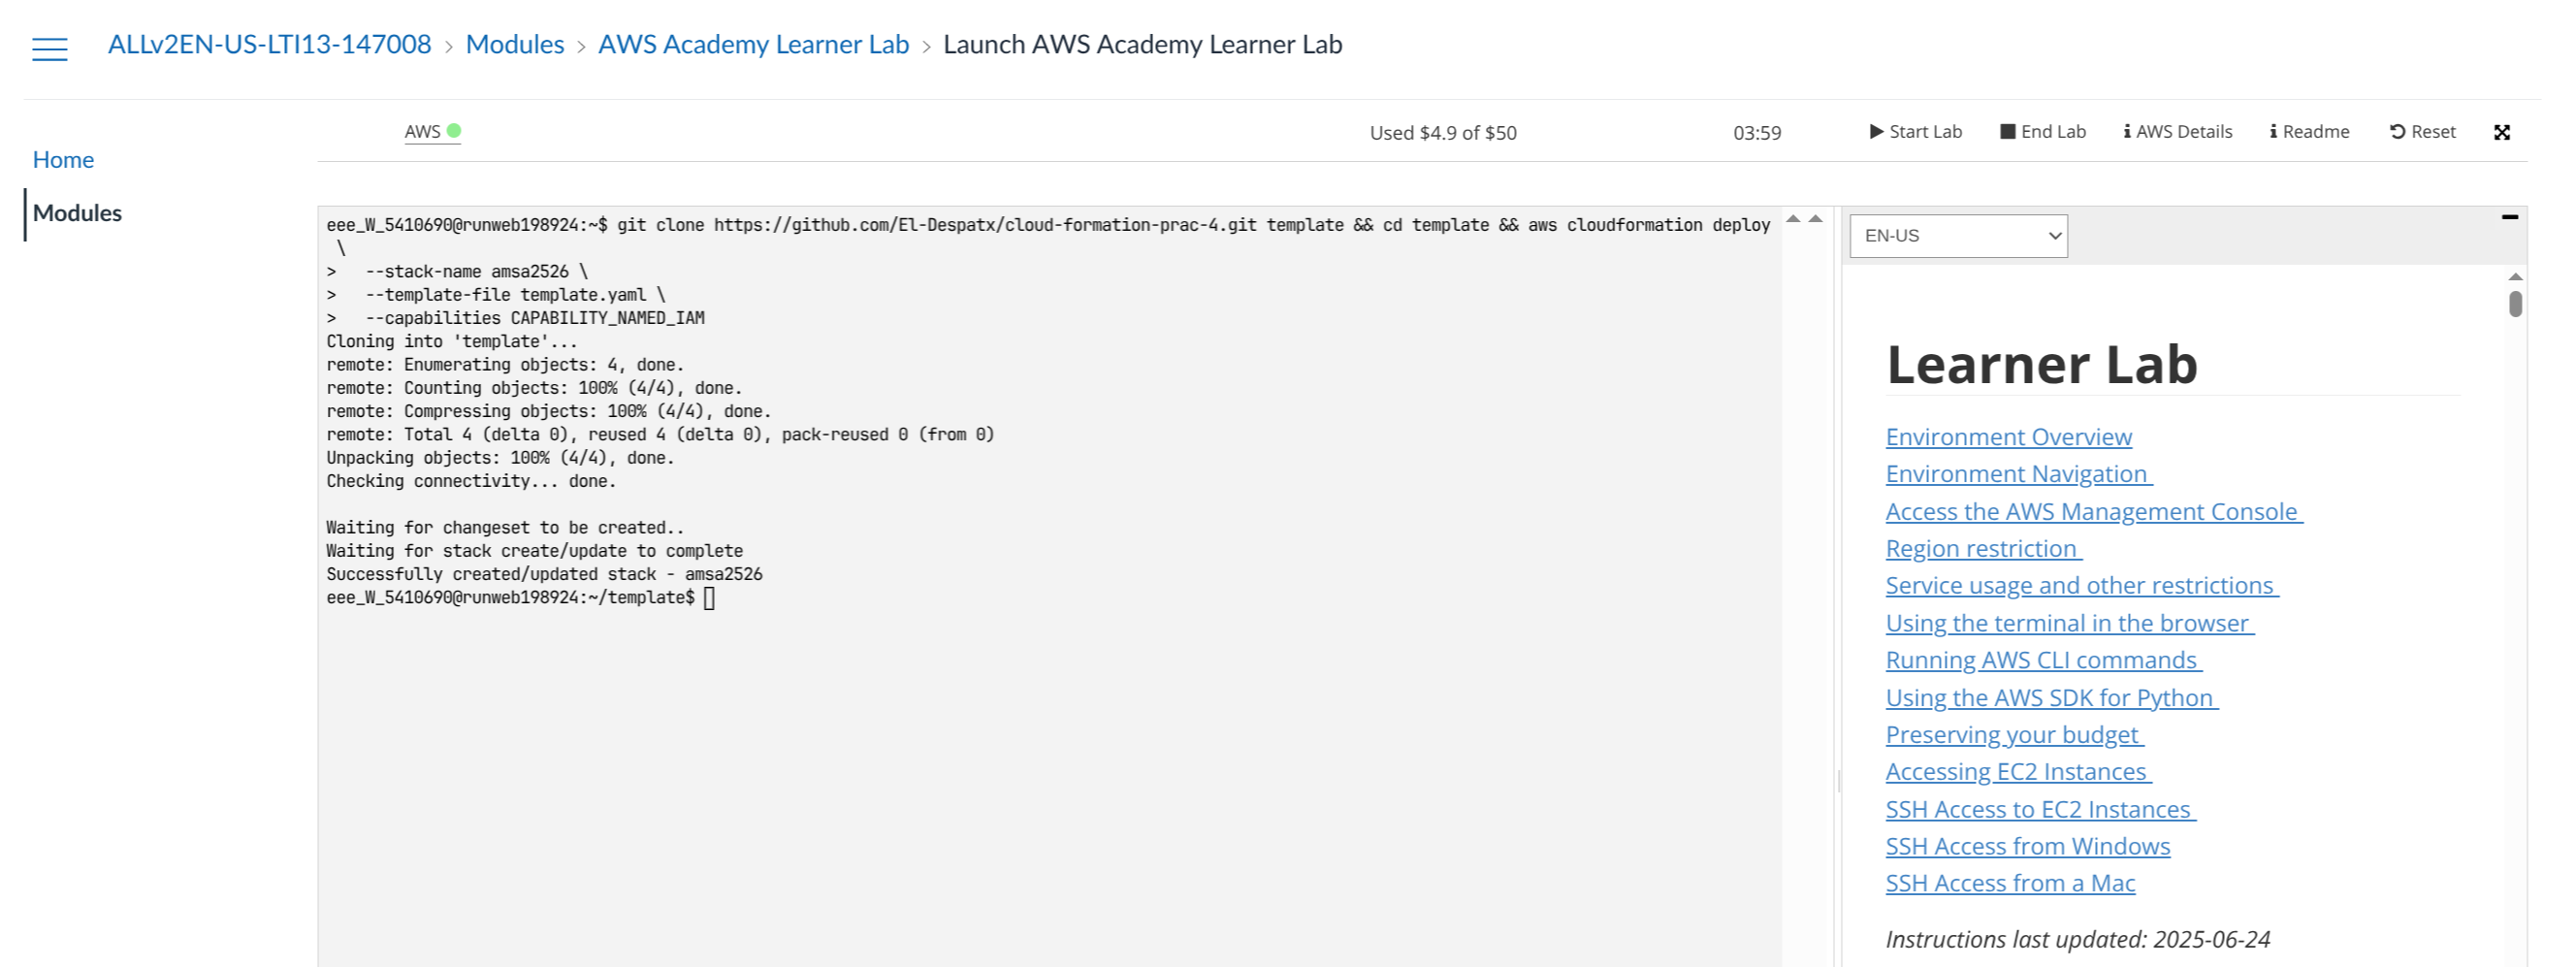
Wait for the command to finish, or the resources won’t be created successfully!
Access AWS UI
Click on the AWS 🟢 on the top left corner:
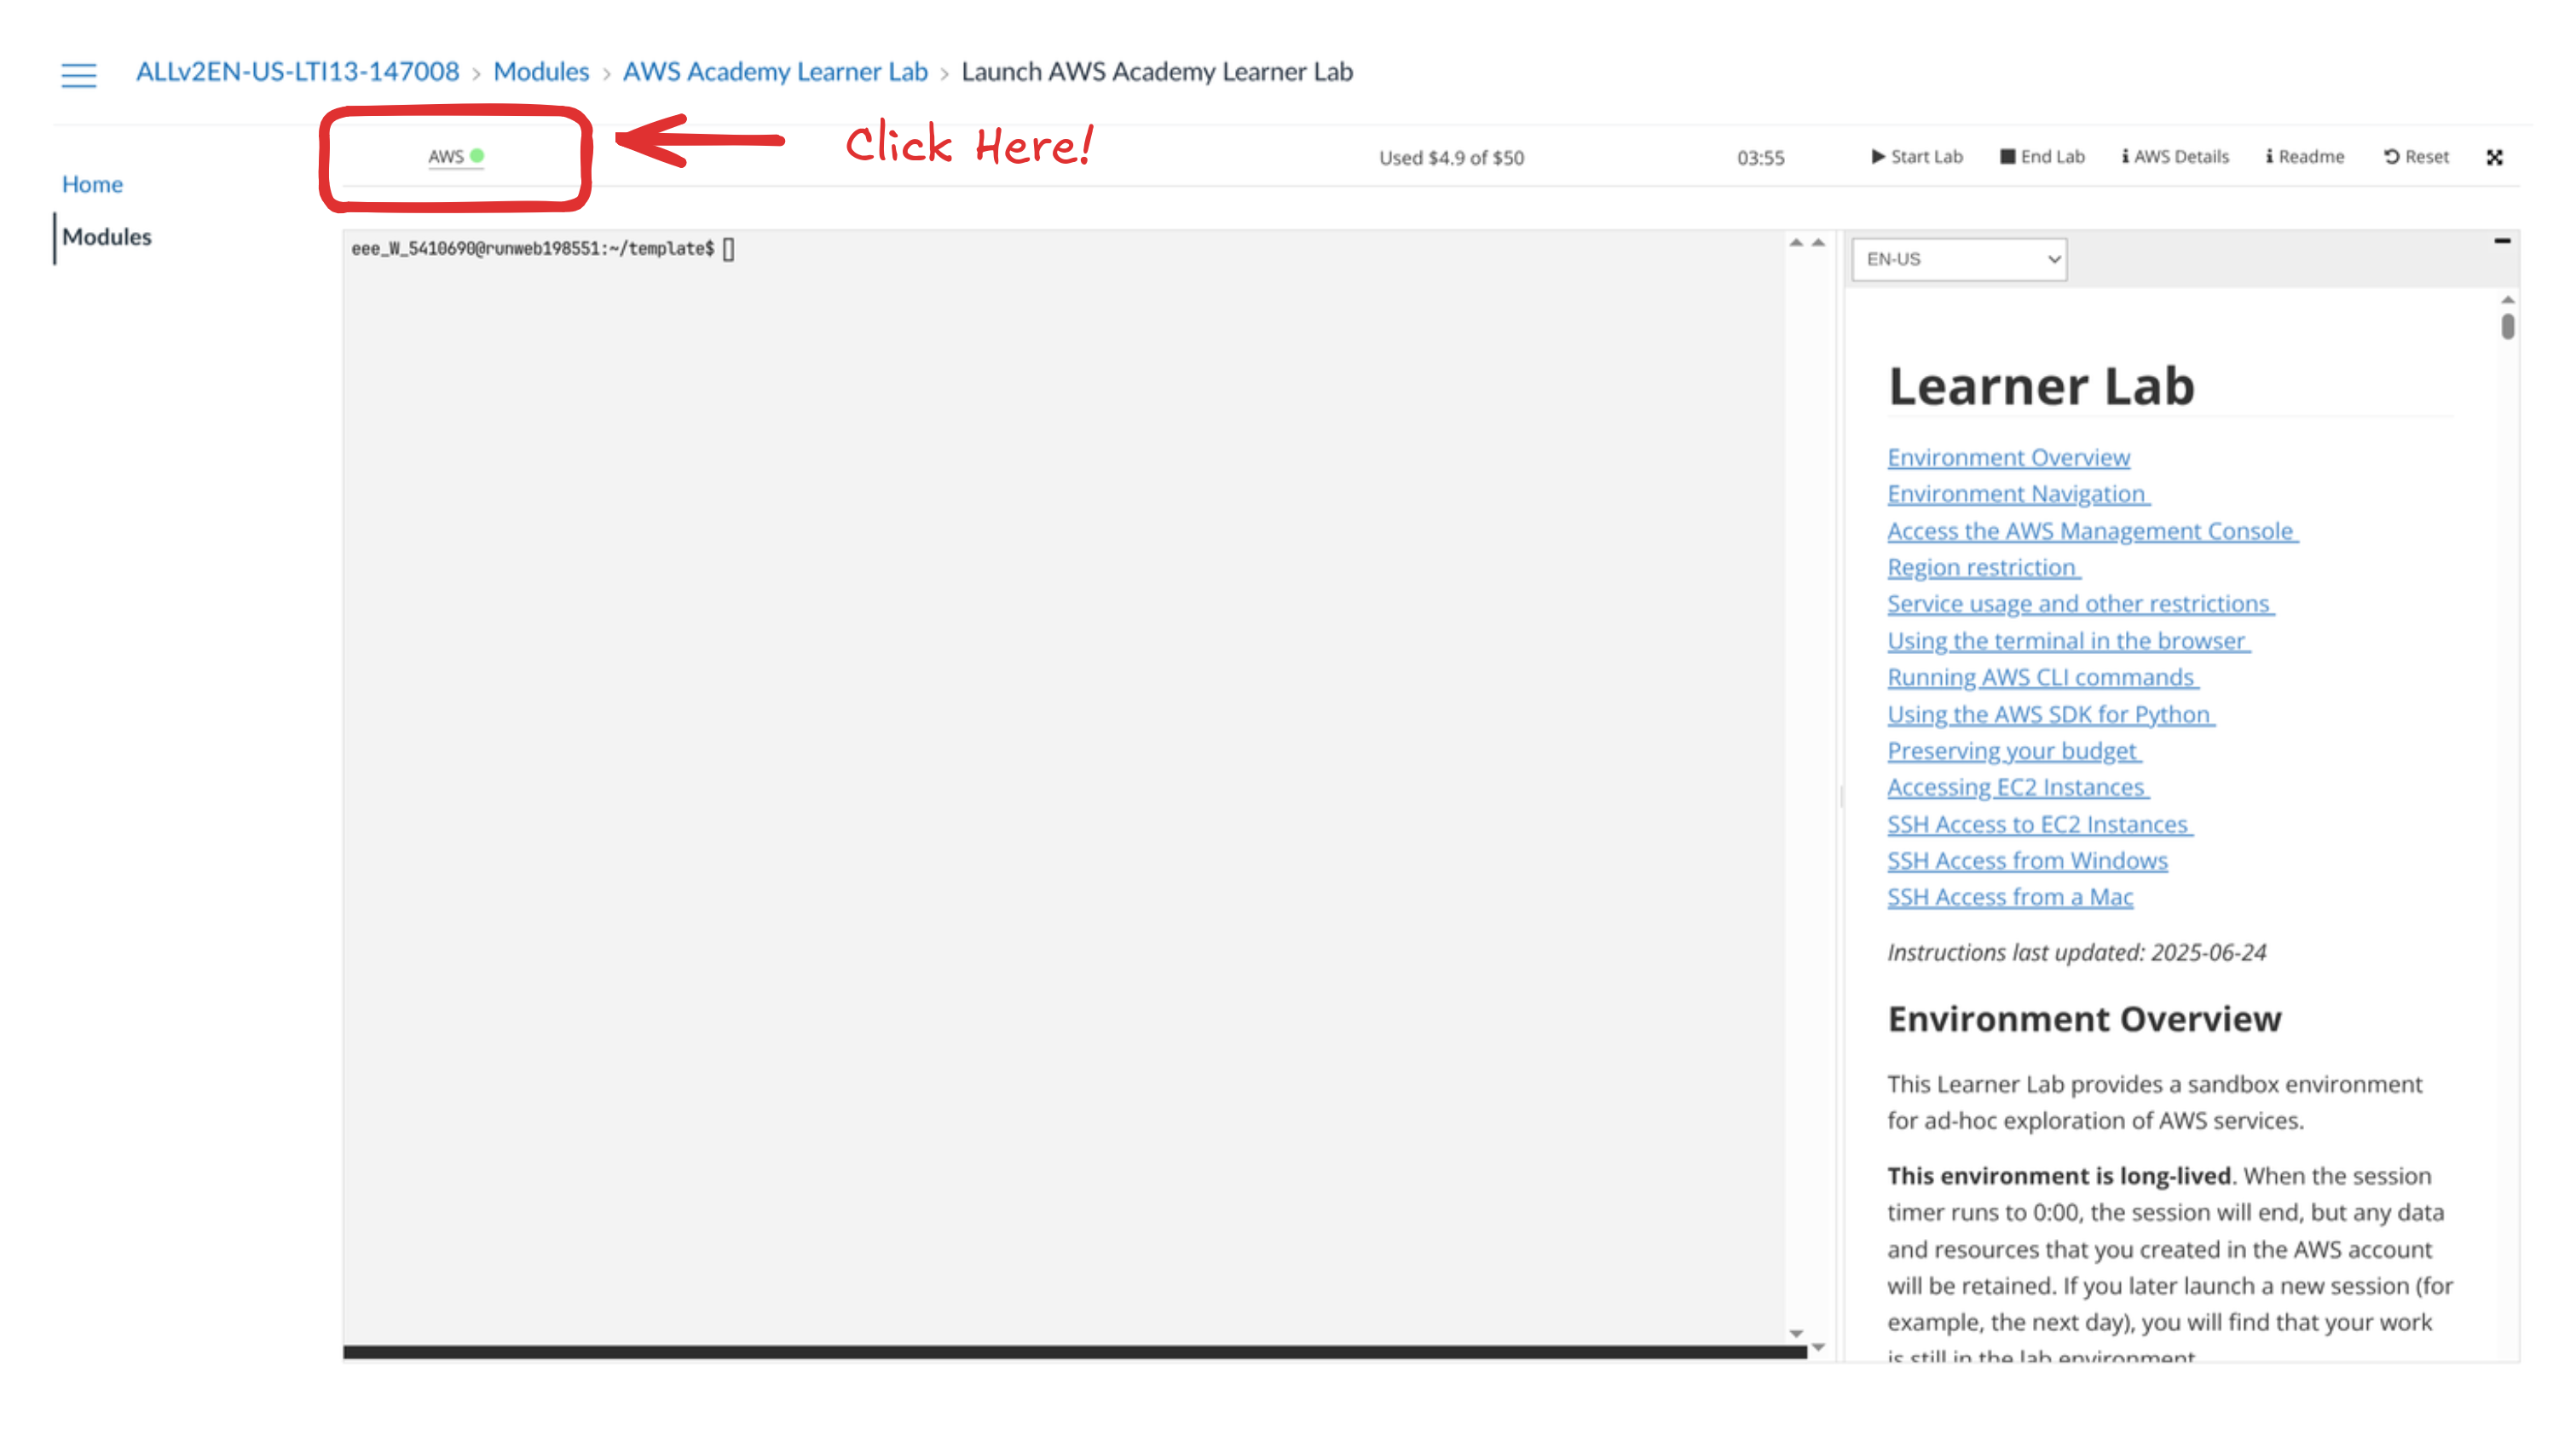
You’re now on a “normal” AWS Services UI: 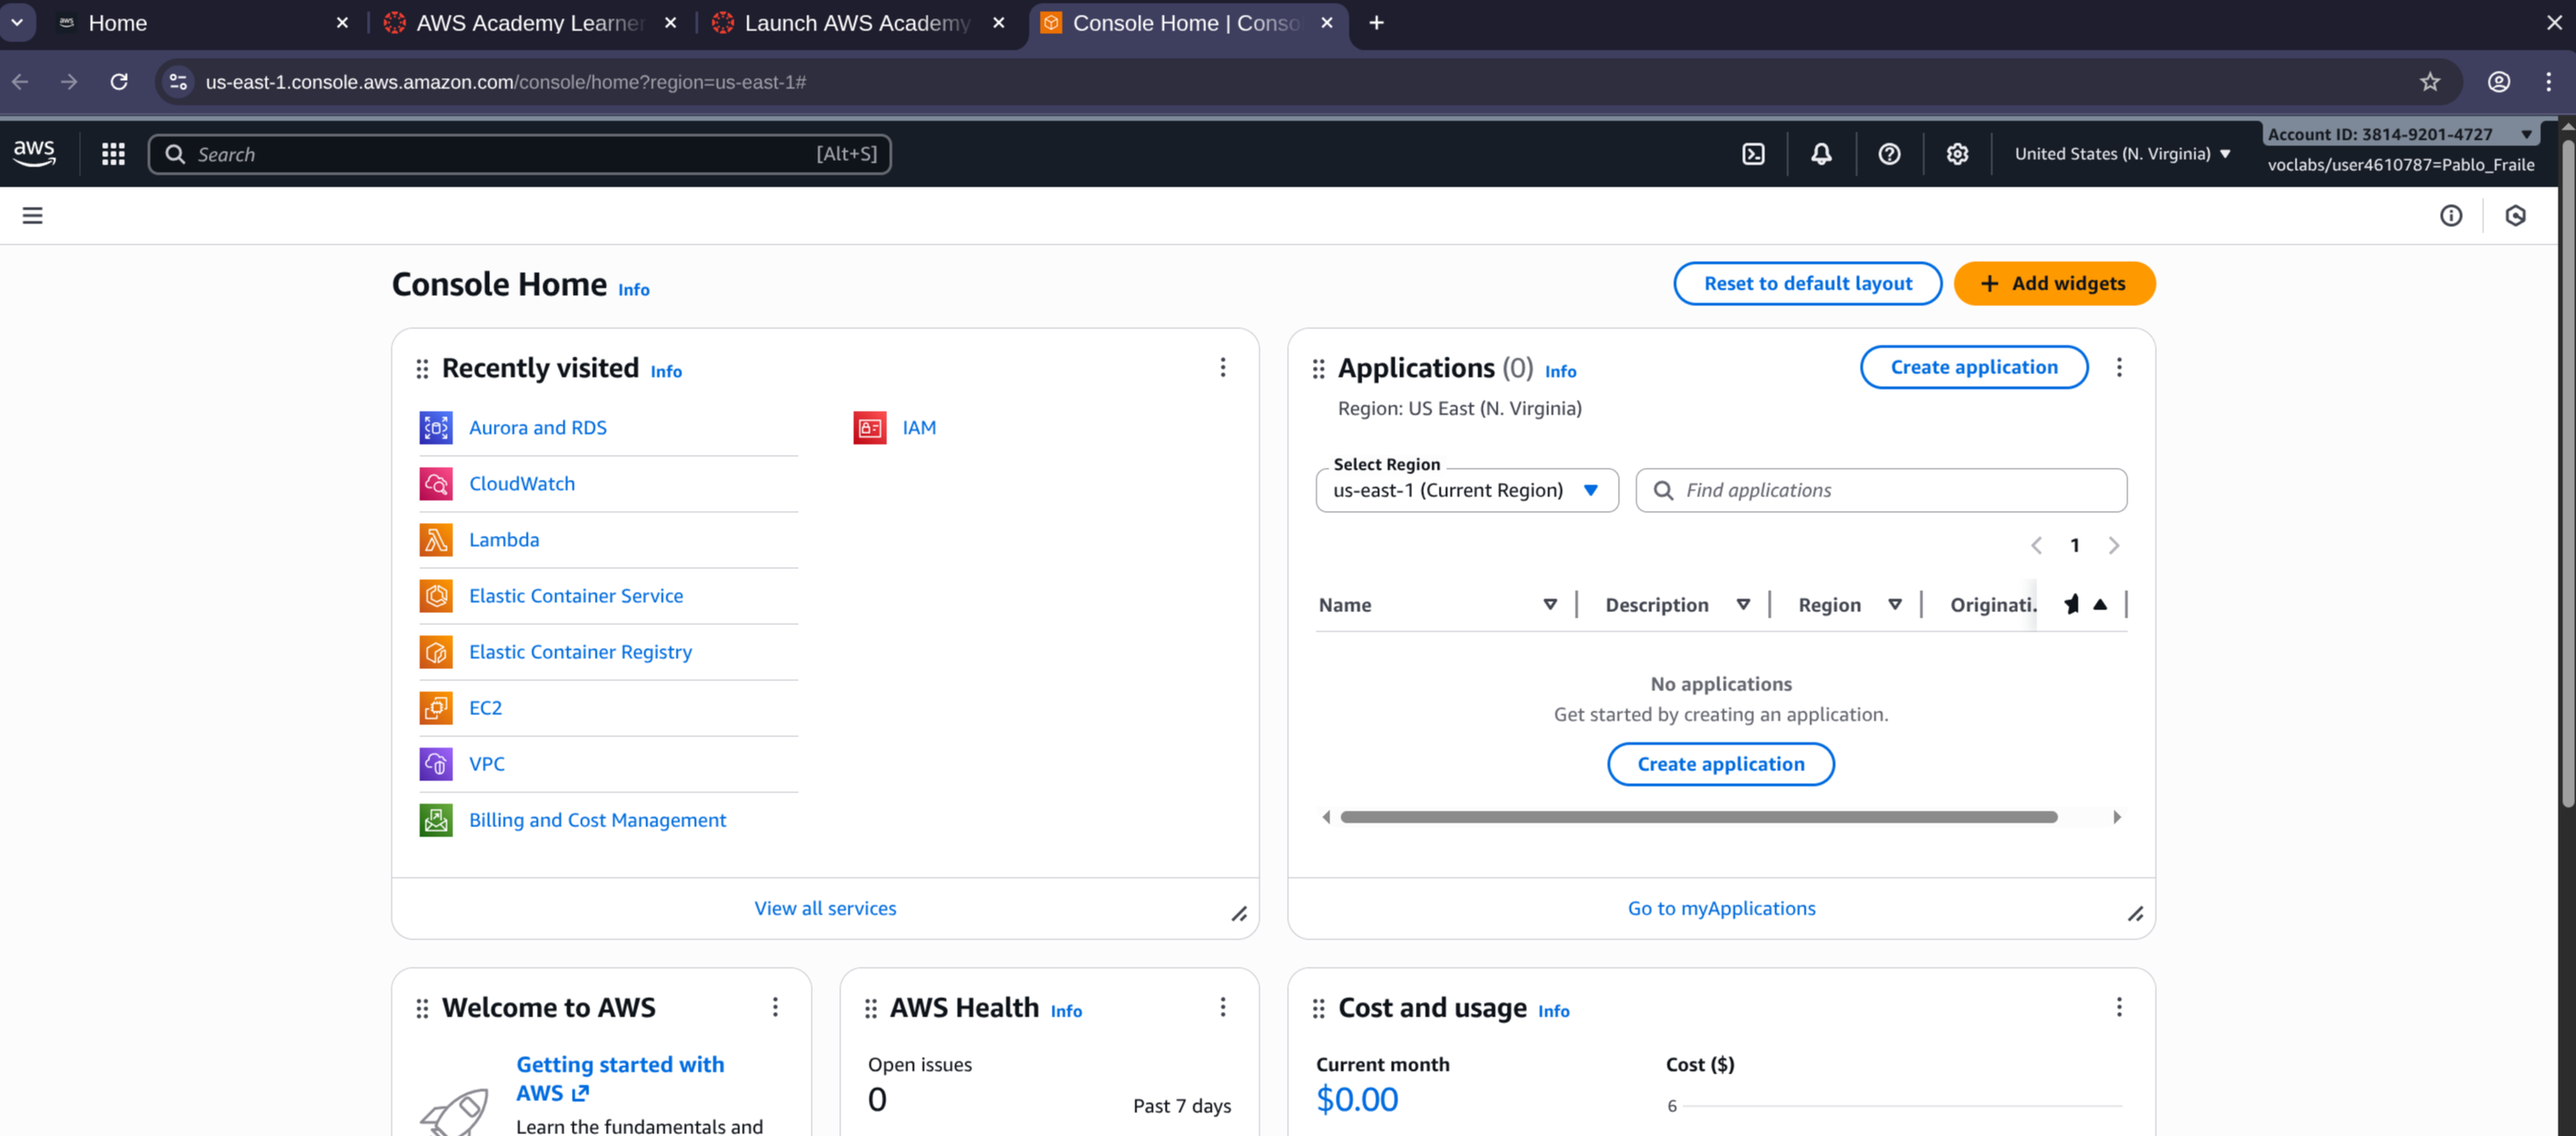
End the Lab
Ending an AWS lab ensures that all the resources created during the session are properly shut down.
If you don’t end the lab, those resources may continue running and consume your limited AWS budget. While you can leave the lab without ending it, a misconfigured or resource-intensive service could use up your 50$ credit unexpectedly.
This may prevent you from completing future assignments, so it’s important to end each lab to avoid unnecessary costs.
Click on the end lab button: 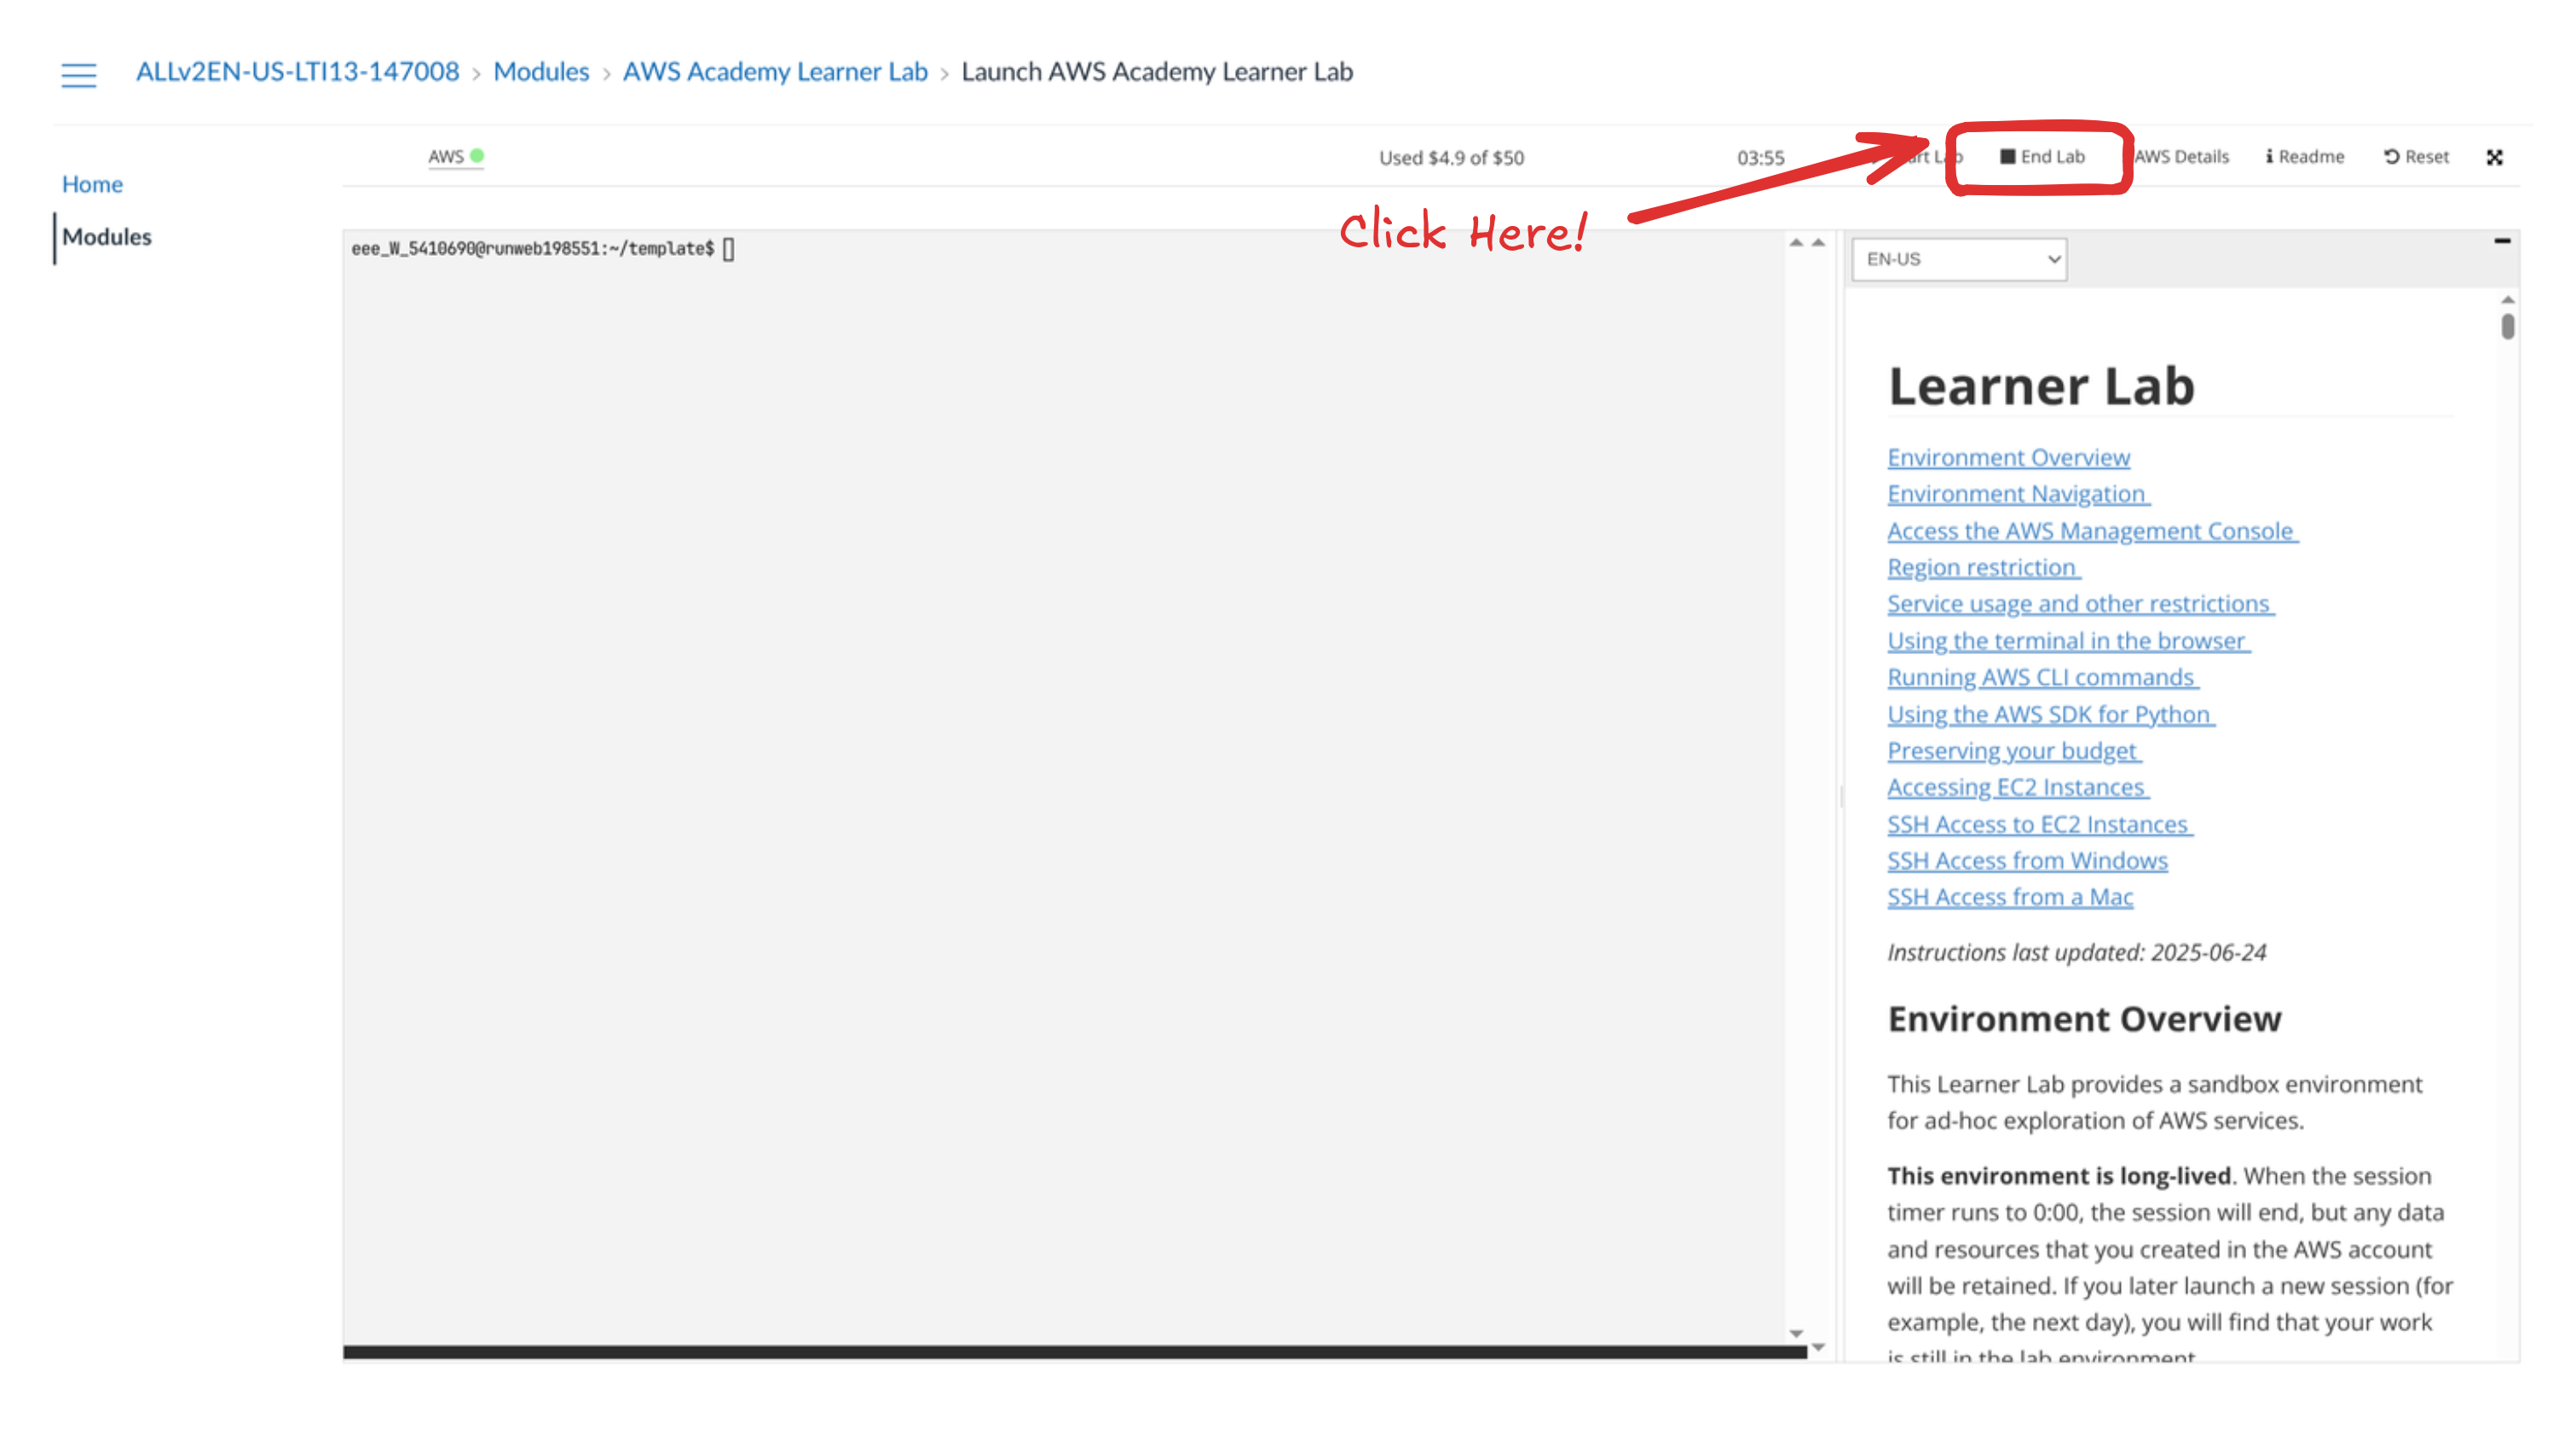
Accept it: 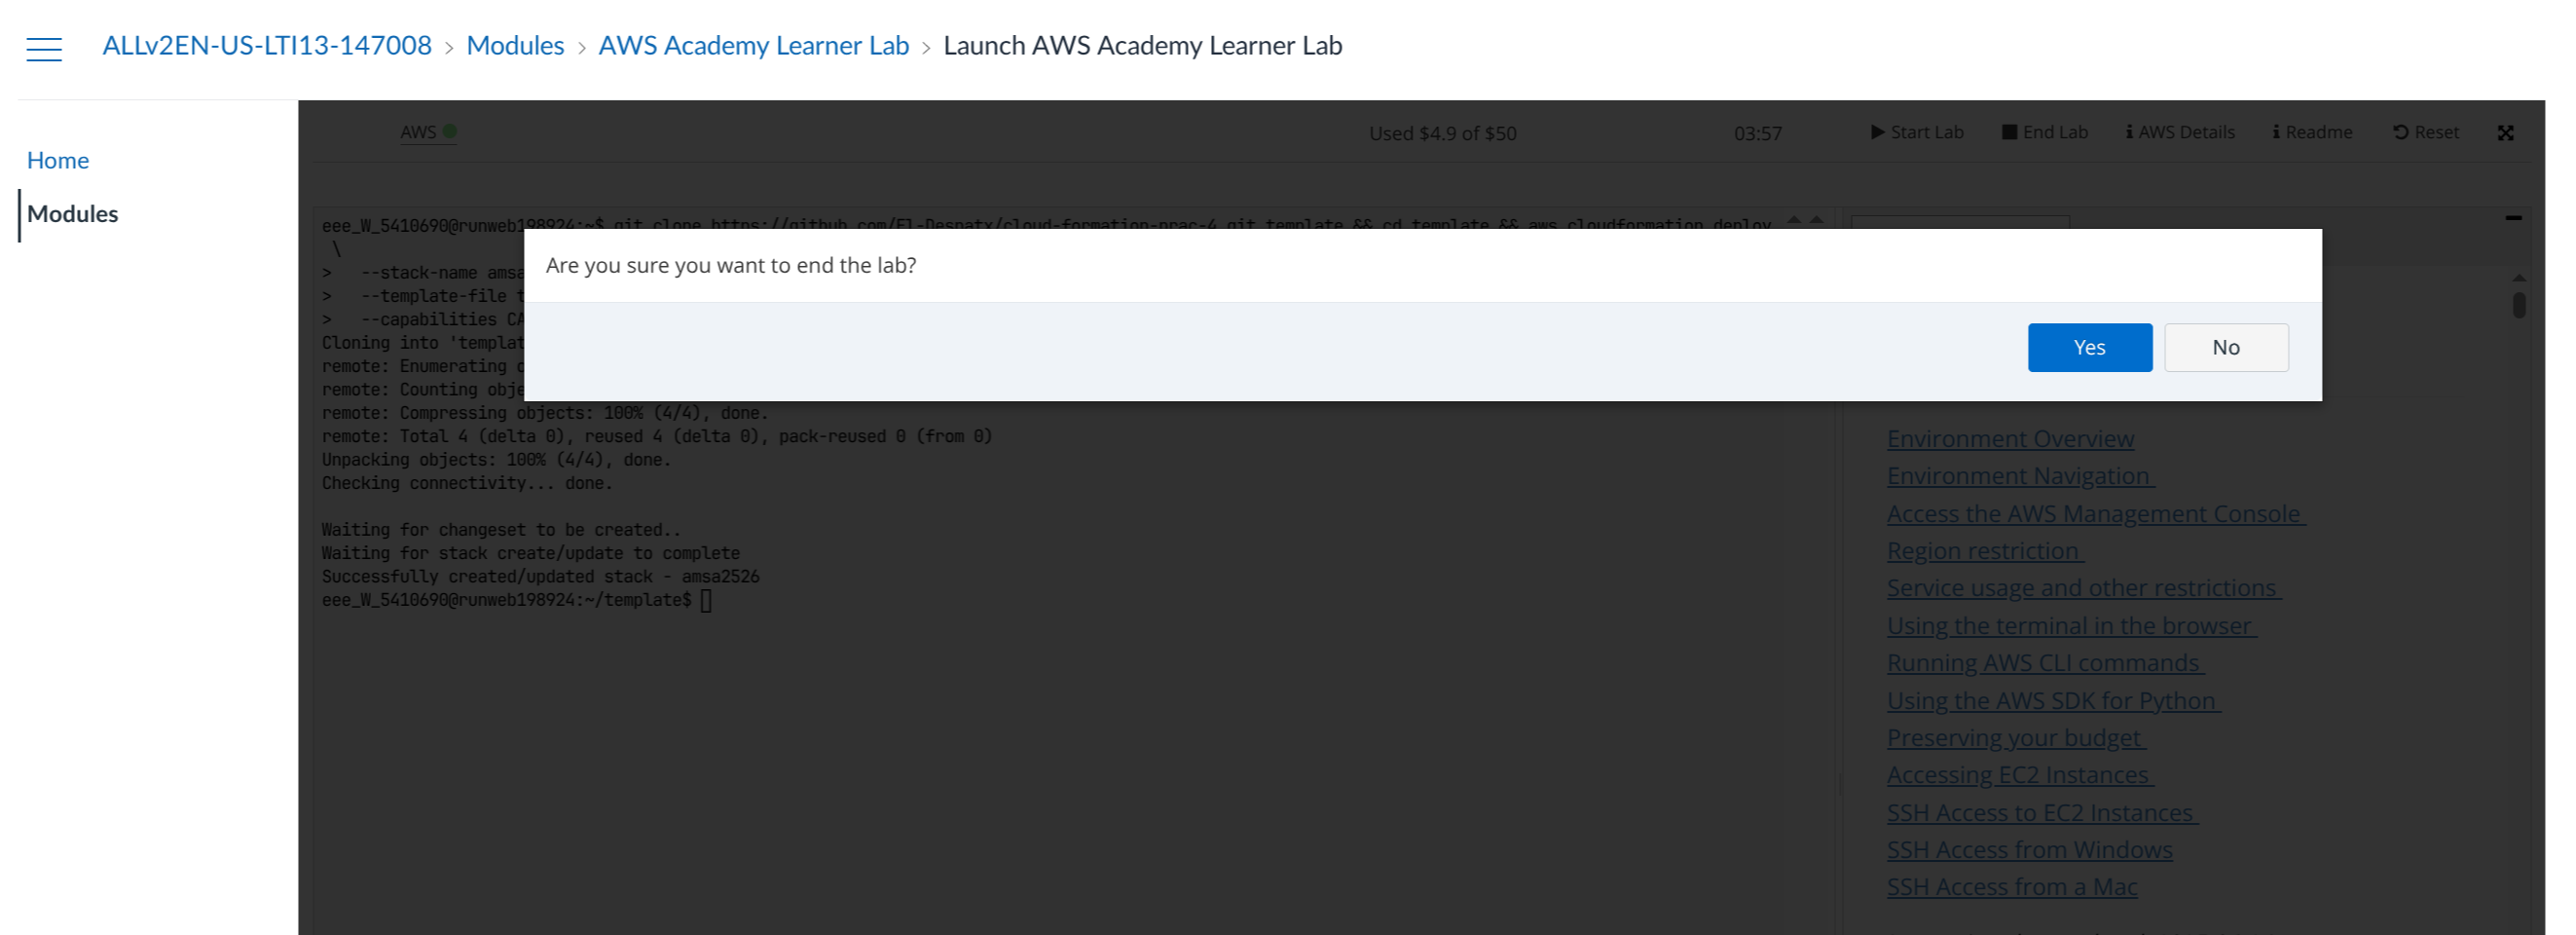
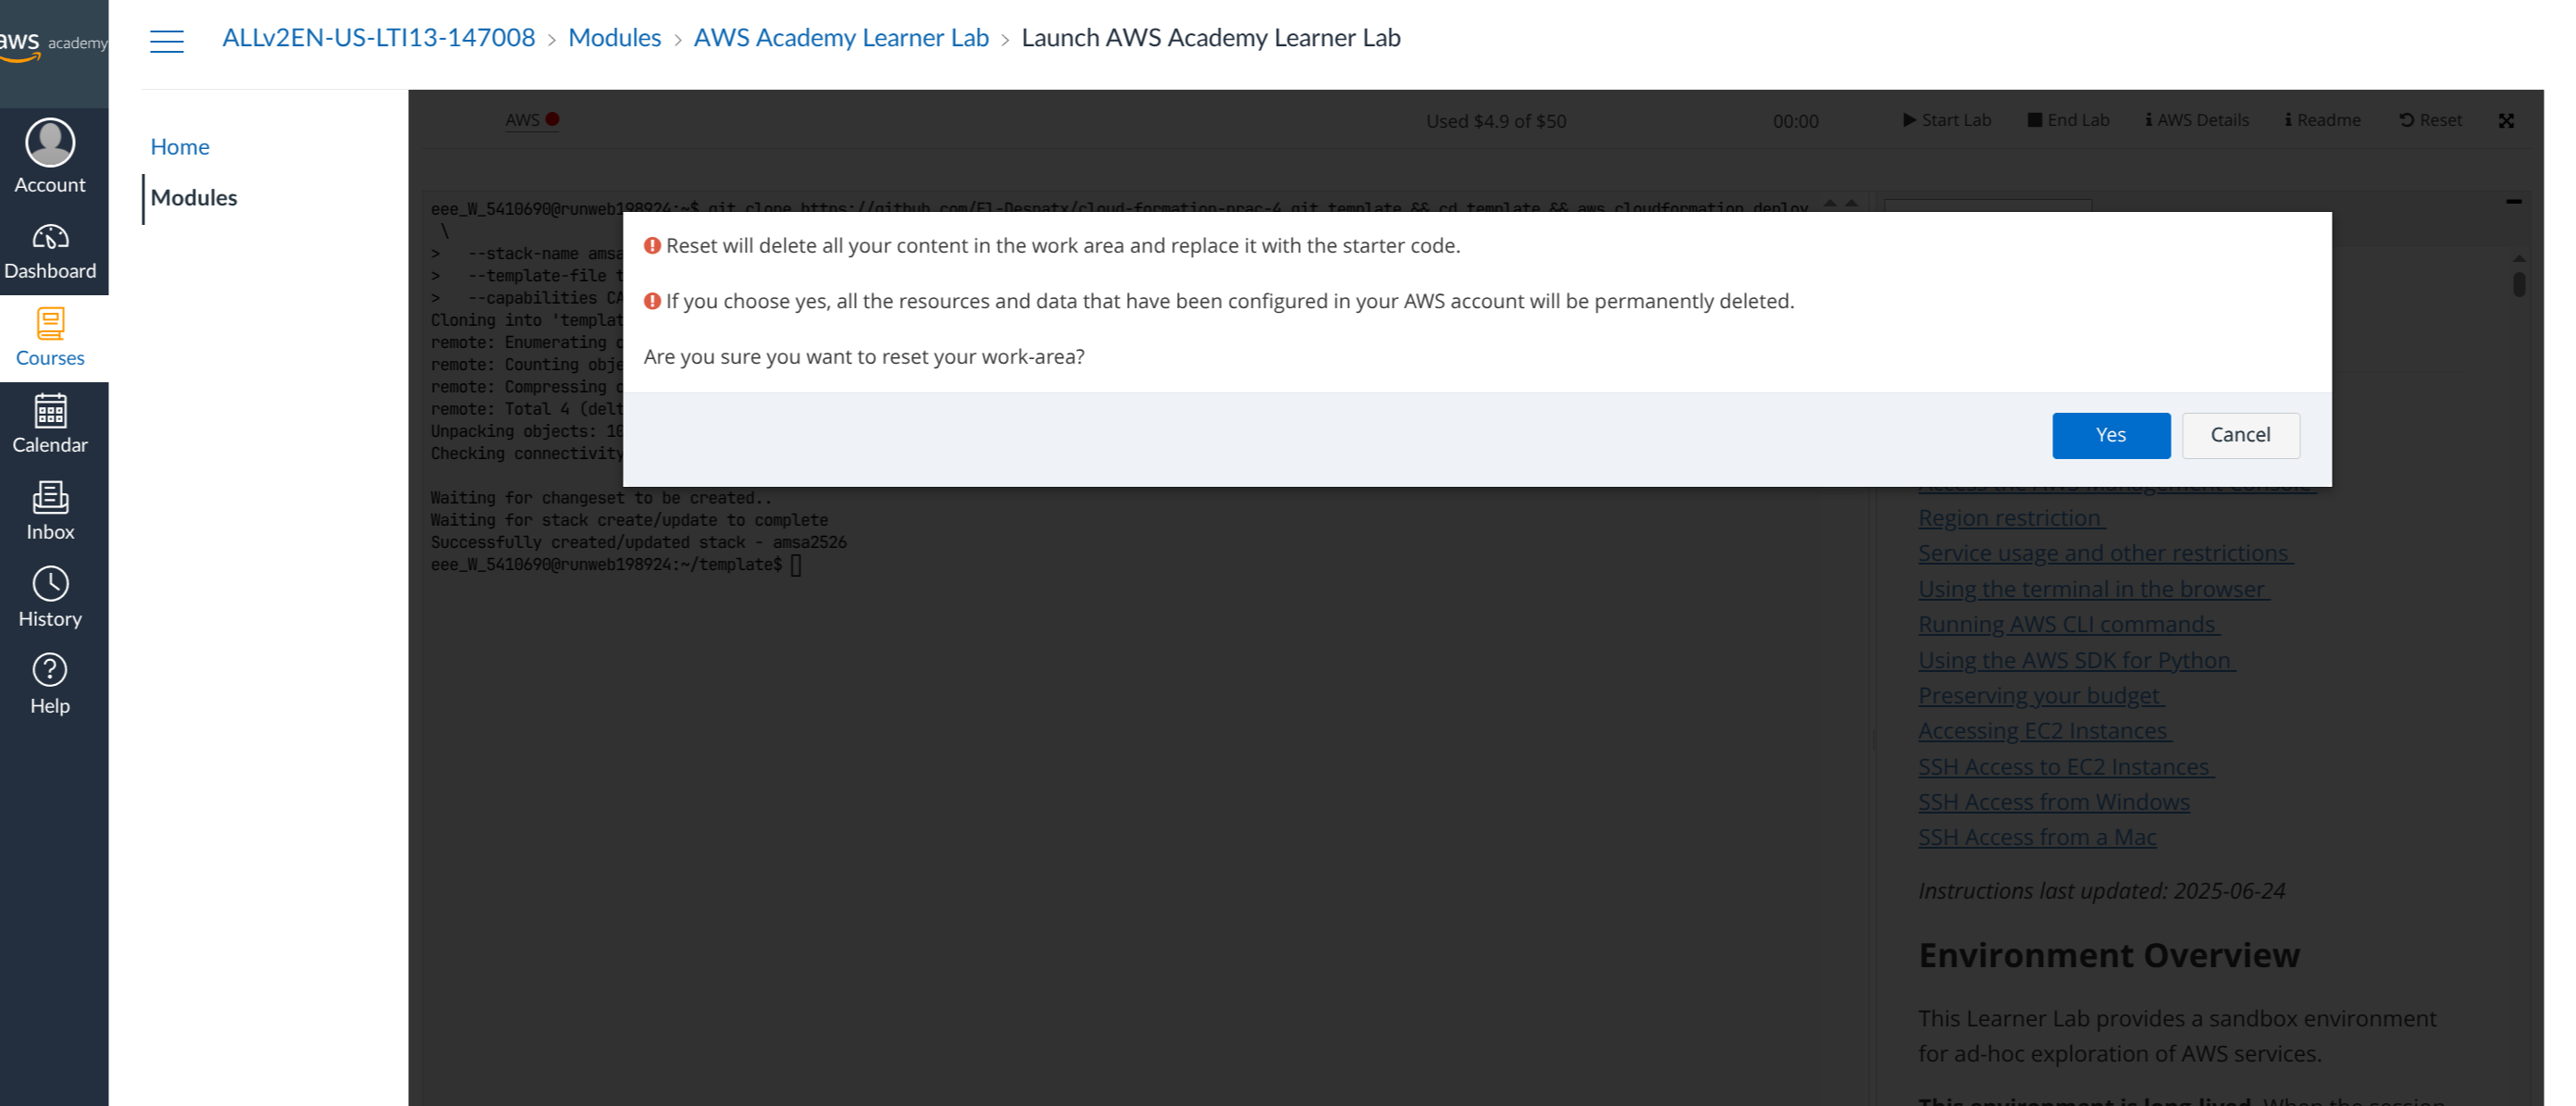
Reset the Lab
You might want to reset an AWS lab to return the environment to its original, clean state when things go wrong or become confusing.
If a service is misconfigured, settings are changed in the wrong way, or the environment no longer matches the lab instructions, resetting is often faster and easier than trying to fix everything manually.
TLDR; Resetting lets you start fresh.
Click on the reset button: 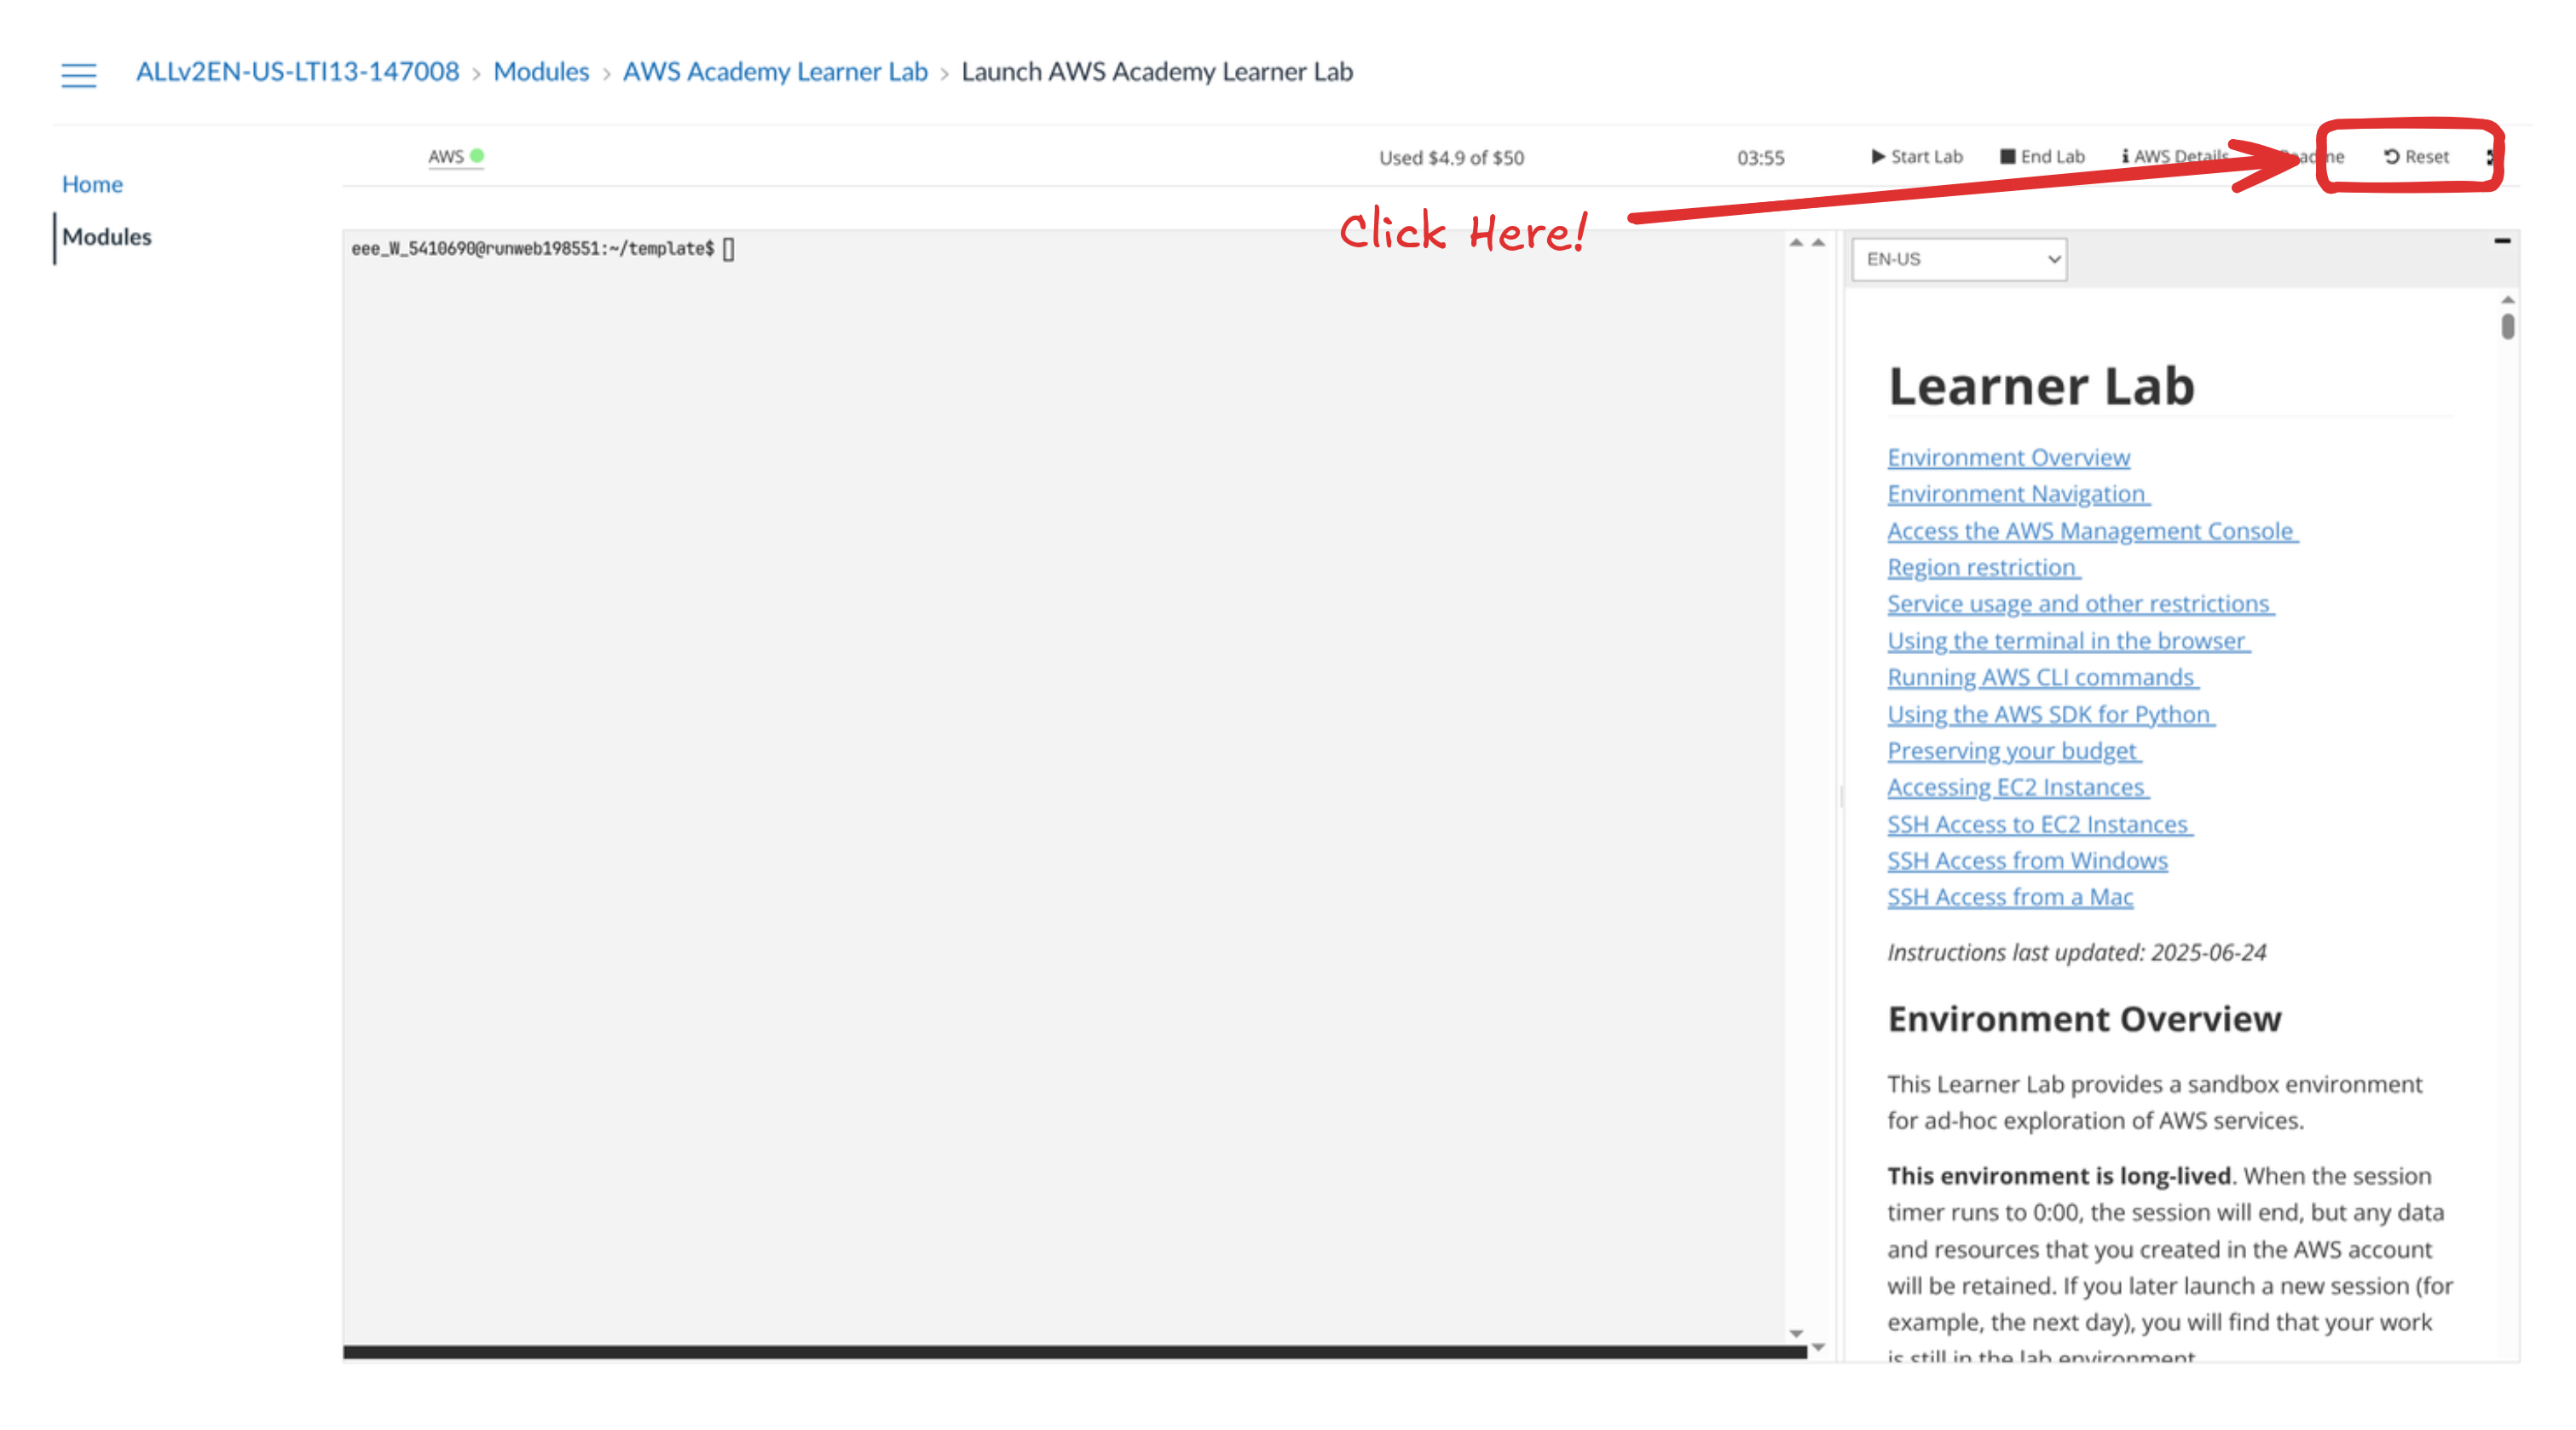
Accept it: